There are many ways to make bracelets with letter beads and string. One way is to thread the beads onto the string in the order that spells out a word or phrase. Another way is to create patterns with the beads by threading them in a certain order.
There are endless possibilities for creating unique and personal bracelets with letter beads and string.
- Decide on the message you want to spell out with your bracelet
- This will determine how many letter beads you need
- Cut a length of string or elastic cord that will comfortably fit around your wrist, plus an extra inch or two for tying the ends together
- String your beads onto the cord in the desired order, spelling out your chosen message
- If you’re using letters and numbers, make sure to put spacers between each word to keep them separated
- Once all of your beads are strung on, tie the ends of the bracelet together securely, making sure there’s no chance of it coming undone and losing your beads
- Trim any excess string from the ends, and enjoy wearing your new bracelet!
Step by Step How to Make Bracelets With Beads And String
Making bracelets with beads and string is a fun and easy activity that can be enjoyed by people of all ages. Here is a step-by-step guide on how to make bracelets with beads and string:
1. Choose your beads.
There are many different types, sizes, and colors of beads available, so take some time to select the ones you like best. You will also need to choose a type of string or thread to use. This can be anything from thin fishing line to thick yarn.
2. Cut a length of string or thread that is long enough to comfortably wrap around your wrist several times, with enough extra to tie a knot. Thread your needle (if using) and tie a knot at one end of the string.
3. String your beads onto the string in any pattern or design you like.
If using a needle, push it through each bead as you add it to the string. Once all the beads are strung, tie a knot at the other end of the string to secure them in place.
4. Wrap the bracelet around your wrist and Tie knots in both ends of thread/string close to your wrist for an adjustable fit .
Trim off any excess thread/string . You now have a beautiful bracelet that you made yourself!
How to Make Letter Bracelets With String
Making bracelets with string is a fun and easy activity that can be enjoyed by people of all ages. All you need is some string, scissors, and a bit of creativity! Here are some simple instructions on how to make letter bracelets with string:
1. Cut a piece of string that is long enough to wrap around your wrist several times. Make sure to leave enough excess string so that you can tie the bracelet off once it is complete.
2. Tie a knot at one end of the string to create a starting point for your bracelet.
3. Begin threading letters onto the string, spacing them out evenly as you go. You can spell out any word or phrase you like – get creative!
4. Once all of the letters have been added, tie off the end of the bracelet with another knot.
Trim any excess string, and your bracelet is now ready to wear!
How to Make Bracelets With Beads Step by Step
If you’re looking for a fun and easy craft project, making bracelets with beads is a great option! With just a few supplies, you can make beautiful bracelets that are perfect for gifts or to keep for yourself. Here’s a step-by-step guide to making bracelets with beads:
1. Gather your supplies. You’ll need some beads (of course!), elastic cord, and scissors. You can find all of these items at your local craft store.
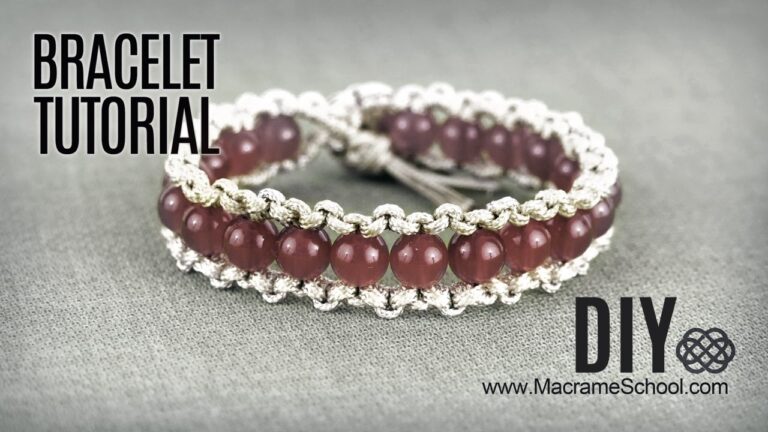
2. Cut a length of elastic cord that will fit comfortably around your wrist. Add an extra inch or two to account for knotting the ends of the cord together.
3. String your beads onto the cord, using as many or as few as you like.
Get creative with different colors and patterns!
4. Once all of your beads are on the cord, tie the ends together securely, making sure there is no slack in the bracelet. Trim any excess cord if needed.
Friendship Bracelet With Letter Beads
If you’re looking for a fun and easy friendship bracelet to make, try this one with letter beads! It’s a great way to show off your initials, or the initials of your best friend. You can use any color combination you like, but we think black and white looks really sharp.
To make this bracelet, you’ll need:
-Embroidery floss in two colors (we used black and white)
-Scissors
-Letter beads (we used 6mm beads)
-Lobster claw clasp & jump rings
1. Cut two lengths of embroidery floss, each about 2 feet long.
Tie the ends together to form a loop. Thread on your letter beads, spelling out whatever message you like. We went with BFF (best friends forever).
Finish by tying the ends of the floss together again. Trim any excess floss.
2. Attach a lobster claw clasp to one end of the bracelet using a jump ring.
Repeat on the other end. And that’s it – your friendship bracelet is finished!
Friendship Bracelet With Beads Pattern
Are you looking for a fun and easy friendship bracelet pattern? Look no further than this beaded bracelet tutorial! This pattern is perfect for beginners, as it only uses a few basic stitches.
And best of all, it’s easily customizable to fit any wrist size.
To make this bracelet, you will need:
-Embroidery floss in your choice of colors (I used 6 strands)
-Beads (I used seed beads)
-Scissors
-Tape measure or ruler
-Needle with a large eye (optional)
First, cut 6 strands of embroidery floss to about 18 inches each. Then tie them together at one end with a knot, leaving about 2 inches of slack.
Tape the knotted end to a flat surface like a table or desk. This will make it easier to work with the floss. Next, thread on your beads according to your chosen pattern.
I did 3 rows of 2 beads followed by 1 row of 4 beads. Once you have added all your beads, tie the loose ends together with another knot, making sure it’s tight against the last bead. Trim any excess floss and enjoy your new bracelet!

Credit: www.pinterest.com
How Do You Put Beads on a Thread Bracelet?
There are a few different ways that you can put beads on a thread bracelet. The first way is to simply string the beads onto the thread. This works best with small beads that have big holes.
You will need a needle with an eye large enough to fit the thread through, and then you can just string the beads onto the thread. Once all of the beads are on, tie a knot at the end of the thread to secure them in place.
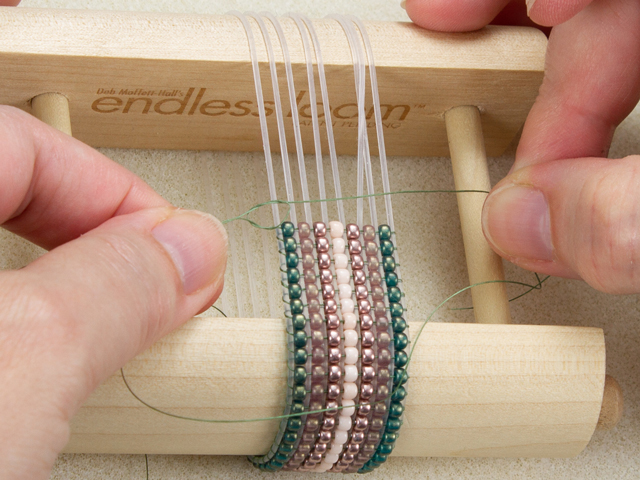
Another way to put beads on a thread bracelet is by using a beading loom.
This is especially helpful if you want to make patterns with your beads or if you are using larger beads. To use a beading loom, first measure out how long you want your bracelet to be and cut your thread accordingly. Then, set up your loom according to the instructions that come with it.
Once your loom is set up, start stringing your beads onto it one at a time until you have reached the end of your bracelet length. Then, follow the instructions for taking off the bracelet from the loom and tying it off so that all of your beads stay in place.
One last way to put beads on a thread bracelet is by using elastic cord instead of regular thread.
This method is great for making bracelets that are stretchy and easy to take on and off. To do this, simply string your chosen beads onto an elastic cord until it is as long as you want your finished bracelet to be.
How Do You Put Letter Beads on a Friendship Bracelet?
There are a few ways to put letter beads on a friendship bracelet, but the most common is to use an embroidery needle. First, thread the needle with string or embroidery floss and tie a knot at the end. Next, slide the bead onto the needle and then thread it through the loop of string already on the bracelet.
Pull tight and repeat with more beads until you’ve spelled out your message.
What Can You Do With Letter Beads?
One of the most popular crafts for kids is threading letter beads onto string to make bracelets, necklaces and keychains. But there are plenty of other fun things you can do with letter beads as well! Here are a few ideas:
-Make a personalized bookmark by threading your name or initials onto some beads and attaching them to a ribbon or piece of yarn.
-Spell out motivational words or phrases like “believe” or “dream big” to keep you inspired throughout the day.
-String together birthdays, anniversaries, or other important dates for a special reminder necklace.
-Create unique gifts for friends and family members by spelling out their names, nicknames, or inside jokes.
How Do You Make a Bracelet With Just String?
Assuming you would like a tutorial on how to make a bracelet with string:
You will need:
-String (any kind)
-Scissors
-Lighter (optional)
Instructions:
1. Cut your string to the desired length. For an average sized wrist, cut the string to about 18 inches. If you want the bracelet to be looser or tighter, adjust the length of the string accordingly.
You can always trim off any excess later.
2. Tie a knot at one end of the string, as close to the end as possible. This will create a small loop.
If your string is too thick or stiff to tie a knot, you can use pliers instead. Just twist the end of the string around itself until it forms a secure loop. 3. Thread the other end of the string through the loop you just created, so that it comes out on the other side.
Pull tight so that there is no gap in between and both ends of the string are facing up. 4. Begin braiding! Take hold of all three strands of string and cross them over in one direction, then under in the next direction (over, under, over, under).
Keep going until you reach about 6 inches from where you started braiding 5. Once you’re about 6 inches from where you started braiding (or when your braid is long enough), take all three strings and thread them through another loop created by tying a knot at this point (or using pliers). Again, pull tight so there’s no gap in between and both ends are facing up 6 Finish braiding until there’s only about an inch or two left unbraided 7 To finish off your bracelet , thread both remaining strings through one last loop created by either tying a knot or using pliers 8pull both strings tight so that they’re flush against each other , then use scissors to trim off any excess 9if desired ,Use a lighter to quickly run along all exposed edges ofstring . This will help seal and prevent fraying 10wear & enjoy !
How to Make Friendship Bracelet with Letter Beads
Conclusion
This post provides a simple tutorial for how to make bracelets with letter beads and string. The process is straightforward and only requires a few supplies. With this method, you can create personalized bracelets for yourself or as gifts for friends.

