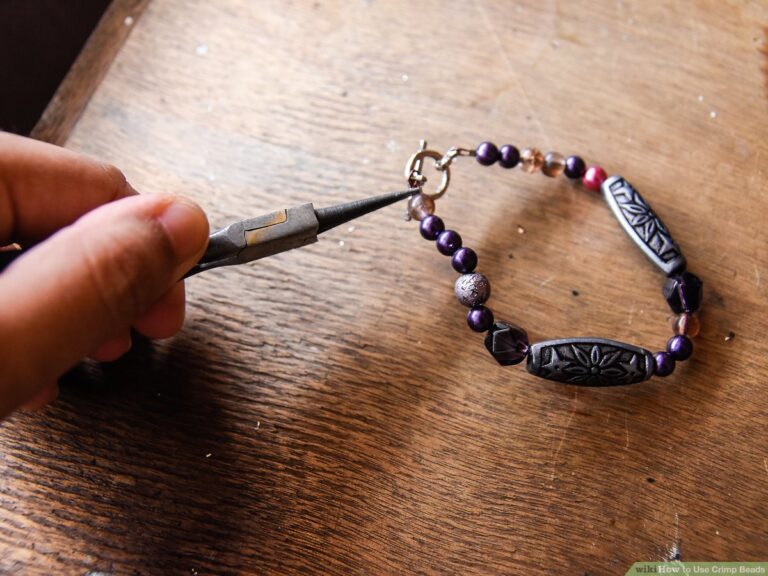
Step 1: Gather your materials. For this project you will need beads, wire, needle-nose pliers, and scissors.
Step 2: Cut a length of wire.
The length of the wire will depend on the size and number of beads you are using. A good rule of thumb is to add an extra inch to the total length you want your earrings to be.
Step 3: String your beads onto the wire.
Use needle-nose pliers to help thread the beads onto the wire if necessary. Make sure that all of the beads are facing in the same direction.
Step 4: Create a loop at one end of the earrings.
To do this, take hold of the end of the wire with your needle-nose pliers and make a small loop. This loop will act as a stopper so that your beads don’t fall off.
Step 5: Finish off the other end of the earrings in the same way by creating another small loop with your needle-nose pliers.
- thread a needle with beading thread 2
- string on 6 beads 3
- tie a knot at the end of the thread 4
- trim excess thread 5
- repeat steps 2-4 for the other earring
How to Make Beaded Earrings Native American
Beaded earrings are a beautiful and unique way to show your Native American heritage. They are also a great way to add a personal touch to your jewelry collection. Making beaded earrings is a fun and easy project that anyone can do, regardless of their beading experience.
There are two basic types of beaded earrings: dangle and post. Dangle earrings are the most popular type, as they are more versatile and can be worn with any outfit. Post earrings are slightly more difficult to make, but they offer a more traditional look.
To make either type of earring, you will need the following supplies:
– Seed beads in your choice of colors (I recommend using at least two different colors for contrast)
– Earring hooks (you can find these at any craft store)
– Beading needle
– Beading thread (I prefer FireLine or Nymo)
– Scissors
Start by threading your needle with about 3 feet of beading thread. Tie a knot at the end of the thread to secure it. Then, string on around 30 seed beads.
These will form the base of your earring and can be any color you like. Once you have added all of the beads, tie another knot close to the beads to secure them in place. Leave a long tail of thread so that you can easily attach the hook later on.
Next, string on 2-3 small accent beads (I usually use contrasting colors for these). Then add 1 larger bead followed by 2-3 more small accent beads. Continue this pattern until you reach the desired length for your earring (I usually make mine around 2 inches long). To finish off the earring, simply add one last large bead followed by 2-3 small accent beads. Again, tie a knot close to the beads to secure them in place before cutting off the excess thread. Now all you need to do is attach your hooks and enjoy wearing your new handcrafted Native American earrings!
How to Make Beaded Earrings on Felt
Making beaded earrings on felt is a fun and easy way to add some personality to your jewelry collection! Here are some tips on how to get started:
1. Choose your materials.
You will need some beads, felt, thread, needle, and scissors. Pick out beads that you love and that will go well together. Felt comes in many colors, so choose one that compliments your bead selection.
2. Cut a small piece of felt. It should be big enough to fit the beads you have selected, plus a little extra room for stitching.
3. String the beads onto the thread and tie a knot at the end.
This will keep the beads from falling off while you’re working with them.
4. Start stitching the beads onto the felt piece using a basic running stitch . Go slowly and carefully, making sure that each bead is secure before moving onto the next one.
5. Once all of the beads are in place, trim any excess thread and felt from around the edges of your earrings. Now they’re ready to wear!
How to Make Beaded Earrings With Wire
Making beaded earrings with wire is a fun and easy project that anyone can do! All you need is some wire, beads, and pliers, and you can make your own beautiful earrings in no time.
First, start by selecting the beads you want to use for your earrings.
You can choose any color or style of beads you like – mix and match them to create your own unique look. Once you have your beads selected, it’s time to start threading them onto the wire. To do this, simply slip each bead onto the wire one at a time until you have the desired length for your earrings.
Next, using a pair of pliers, make a small loop at each end of the wire. This will keep your beads from slipping off of the wire. Finally, use another piece of wire or jump rings to attach each earring to an earwire (or whatever type of findings you’re using).
And that’s it! You’ve now made yourself a lovely pair of beaded earrings.
How to Make Beaded Hoop Earrings
Making beaded hoop earrings is a fun and easy way to add a personal touch to your jewelry collection. All you need are some basic craft supplies and a little bit of time. Here’s how to make your own beaded hoop earrings:
1. gather your supplies. You will need some wire, beads, pliers, and scissors. You can find all of these items at your local craft store.
2. Cut a piece of wire that is about 6 inches long. Using the pliers, bend the wire in half so that you have a loop at one end.
3. String the beads onto the wire.
Make sure that the beads are small enough to fit through the loop at the end of the wire. Once you have added all of the beads, use the pliers to twist the two ends of the wire together so that they are secure.
How to Make Beaded Earrings – Youtube
Making beaded earrings is a fun and easy way to add a personal touch to your jewelry collection. You can find all the supplies you need at your local craft store, and there are plenty of Youtube tutorials to help you get started.
The first step is to choose the beads you want to use.
There are endless possibilities, so take some time to browse through your options before making a decision. Once you have your beads, thread them onto an earring wire or head pin. If using an earring wire, make sure the loop is closed tightly so the beads don’t fall off.
Next, it’s time to start beading! There are many different patterns and designs you can create, so let your imagination run wild. If you need some inspiration, there are plenty of beading books and online tutorials available.
Once you’ve finished beading, simply close the loop (if using a head pin) or make a new loop (if using an earring wire). And that’s it – you’ve now made your very own pair of beaded earrings!
How to Make Long Seed Bead Earrings
Seed beads are a type of small bead that is often used in jewelry making. They come in a variety of colors and sizes, and can be strung together to create beautiful earrings. Making long seed bead earrings is a relatively simple process that just requires a few materials and some patience.
To make long seed bead earrings, you will need:
– Seed beads (choose your favorite colors!)
– Jewelry wire
– Wire cutters
– Needle nose pliers (optional)
1. Begin by measuring out a length of jewelry wire.
It’s important to leave enough wire at the end so that you can easily attach it to your earring findings later on. Cut the wire using your wire cutters.
2. Next, start stringing your seed beads onto the wire.
You can string them on one at a time, or do groups of 2 or 3 if you want your earrings to go faster. If you’re using multiple colors, feel free to mix them up however you like!
3. Once all of your seed beads are strung onto the wire, use needle nose pliers (if desired) to twist the end of the wire around itself several times, creating a secure loop.
Trim off any excess wire with your wire cutters.
4. Now all that’s left to do is attach your earring findings (hooks, posts, etc.) and enjoy wearing your newseed bead earrings!
Seed Bead Earrings Patterns Free
If you’re looking for some free patterns to make your own seed bead earrings, you’ve come to the right place! Here are three easy patterns that even a beginner can follow.
The first pattern is a basic loop earring.
To make this, you’ll need about 18 inches of thread and around 50 seed beads. Start by stringing on all of the beads onto the thread. Then, tie a knot at one end of the thread to secure the beads in place.
Next, take the long end of the thread and pass it through the first bead again (this forms the loop). Continue passing the thread through each bead until you reach the end. Finally, tie another knot at the end of the thread to keep everything in place.
Trim any excess thread and your earring is complete!
For something a little more elaborate, try this spiral pattern. You’ll need around 30 inches of thread and 80 seed beads for this one.
Again, start by stringing all of the beads onto the thread. Once they’re all on, tie a knot at one end to secure them in place.
To form the spiral shape, take the long end ofthe thread and pass it back through several beads (around six or seven).
Then begin wrappingthethread around itself, making sure to go through a few beads with each wrap (this will help keep everything in place). Keep wrapping until you reachtheendoftheraw Thread – then tietheknottofinishitoff!Trimanyexcessthreadandyou’re readyto wearyour newearrings!
Finally, for something really different, try this beaded netting pattern. It’s perfect for using up those odd shaped seed beads that are left over from other projects! You’ll need 30 inches of thread and around 100 mixed size seed beads for this one. String all of your beads onto The Read before starting – then tieaKnot attheendtosecurethemInPlace(don’tforgetthis steporYourbeadsmayfall offasYouWork!).
NowtakeonebeadandpusheaNotherethroughItsoThatIt’s Centered intheMiddleoftheBead-string-ThiswillbeYourfirstNodePoint . Next , take two more Beads And add Them TO The First Bead So That Theycreate an X Shape WITH THE CENTER BEAD .

Credit: madeinaday.com
What Do I Need to Start Beading Earrings?
Assuming you would like a blog post discussing what is needed to start making beaded earrings:
Materials needed:
-Beads (of course)
-Jewelry wire
-Wire cutters
-Needle nose pliers
optional but recommended:
-Magnification glasses or a magnifying lamp
Most people have beads and jewelry wire on hand, or can easily acquire them.
If you don’t have wire cutters and needle nose pliers, any kind of cutter and small pliers will do the trick. You can find both of these at any hardware store. If you’re going to be doing a lot of beading, it might be worth investing in some magnification glasses or a magnifying lamp to make the process easier on your eyes.
What Tools Do I Need to Make Beaded Earrings?
If you want to make beaded earrings, you will need some basic jewelry-making supplies. Here is a list of what you will need:
-Beads: You can choose any type, size, or color of beads that you like.
Just make sure that the holes in the beads are big enough to thread onto your wire or string.
-Wire or string: Again, you can choose whatever type of wire or string you prefer. Just make sure it is thin enough to fit through the holes in your beads.
-Wire cutters: You will use these to cut your wire or string to the desired length.
-Needle nose pliers: These pliers have long, thin tips that are perfect for bending and shaping wire, as well as holding small objects like beads.
How Do You Make Stud Earrings Out of Beads?
If you’re a fan of handmade jewelry, then you know that there’s nothing quite like a pair of stud earrings made from beads. Whether they’re simple or embellished, these earrings add a touch of personality to any outfit. But how do you make them?
Here’s a step-by-step guide:
1. Choose your beads. This is the fun part!
You can use any type of bead, from glass to metal to stone. Pick out two that are similar in size and shape, so they’ll look like a matched set when worn as earrings.
2. Thread the beads onto some jewelry wire.
Cut a length of wire that’s long enough to comfortably go through both beads several times. Then, thread the beads onto the wire, leaving about an inch of wire at the end.
3. Make a loop in the end of the wire.
Use needle-nose pliers to bend the end of the wire into a small loop. This will keep the beads from falling off when you wear them later on.
4. Trim excess wire and close the loop tightly .
Once you’ve made sure that your beads are secure on the wire, trim away any excess with scissors and squeeze the loop closed with your pliers so it’s nice and tight..Your stud earrings are now complete!
How Do You String Bead Earrings?
If you’re looking to add a personal touch to your jewelry collection, or just want to create a unique gift for a friend, beading your own earrings is a fun and relatively easy project. All you need are some basic supplies and a little bit of creative flair. In this blog post, we’ll walk you through everything you need to know about stringing beads into earrings, from choosing the right materials to adding the finishing touches.
Choosing Your Materials
The first step in creating your beaded earrings is to gather all of the supplies you’ll need. You won’t need much – just some beads, wire or thread, and some jump rings or other findings.
When it comes to choosing beads, the sky is really the limit. You can use any type of bead that you like, from delicate glass seed beads to colorful gemstone rounds. Just make sure that all of the beads you select are roughly the same size, so that your earrings will look balanced and uniform.
If you’re using multiple colors of beads, try to stick with a theme or color scheme so that your finished earrings look intentional and thought-out.
As for wire or thread, it’s important to choose something that is strong enough to support the weight of your chosen beads without breaking – especially if you plan on wearing your earrings often. We recommend using beading wire for most projects; it comes in different thicknesses (or gauges) depending on how many strands you want in your final design (we recommend starting with 20 gauge), and has an inner core made of steel for extra strength.
If you prefer working with thread, make sure to choose a heavy-duty option like nylon beading thread; regular sewing thread will break easily under tension.
Jump rings are small metal loops that connect different parts of jewelry together; they look like tiny key rings without the split in one side. You’ll use these jump rings to attach your earring wires (which we’ll discuss more later) to each individual bead strand before connecting everything together at the top.
If you don’t have jump rings on hand, don’t worry – there are plenty of other options out there (like lobster claw clasps or even just regular old paper clips!) that will work just as well.
Seed bead earrings tutorial for beginners, brick stitch and bead fringes
Conclusion
In conclusion, this blog post provides clear and concise instructions on how to make beaded earrings. It also includes helpful tips on choosing the right materials and tools, as well as troubleshooting common problems. With a little practice, anyone can create beautiful and unique beaded earrings at home.

