You will need:
-Beads (choose your favorite colors!)
-String or beading wire
-Scissors
-A needle (optional)
1. Cut a piece of string or beading wire about 10 inches long.
If you are using string, you may want to tie a knot at one end to keep the beads from falling off.
2. Start threading your beads onto the string or wire, in whatever pattern you like! Get creative!
3. Once you’ve used up all your beads, cut the excess string or wire off, leaving about an inch to spare. Again, if you’re using string you may want to tie a knot at this end too.
4. To finish, simply tie the two ends of the bracelet together, making sure it’s tight enough that the beads won’t fall off but not so tight that it’s uncomfortable to wear.
You can also use a needle and thread to make a more secure closure. And that’s it!
- Decide on the length of your bracelet
- Cut a piece of beading thread or fishing line to this length, adding an extra inch or two to allow for knotting
- Choose your beads
- For a basic bracelet, you will need about 60 beads in total
- It is best to choose beads that are all approximately the same size
- Thread your needle and tie a knot at the end of the beading thread
- Push the needle through one bead and then back through the next bead, making sure that the thread goes through both holes of each bead (as shown in picture)
- Repeat step 3 until all beads are used up
- To finish, make sure that the final bead is pushed right up against the first bead, then tie a double knot in the thread to secure them together
How to Make a Beaded Bracelet With Clasp
Making a beaded bracelet with a clasp is a great way to add some personality to your jewelry collection. This type of bracelet is also very versatile, as it can be worn with both casual and formal attire. Follow these steps to create your own beaded bracelet with a clasp.
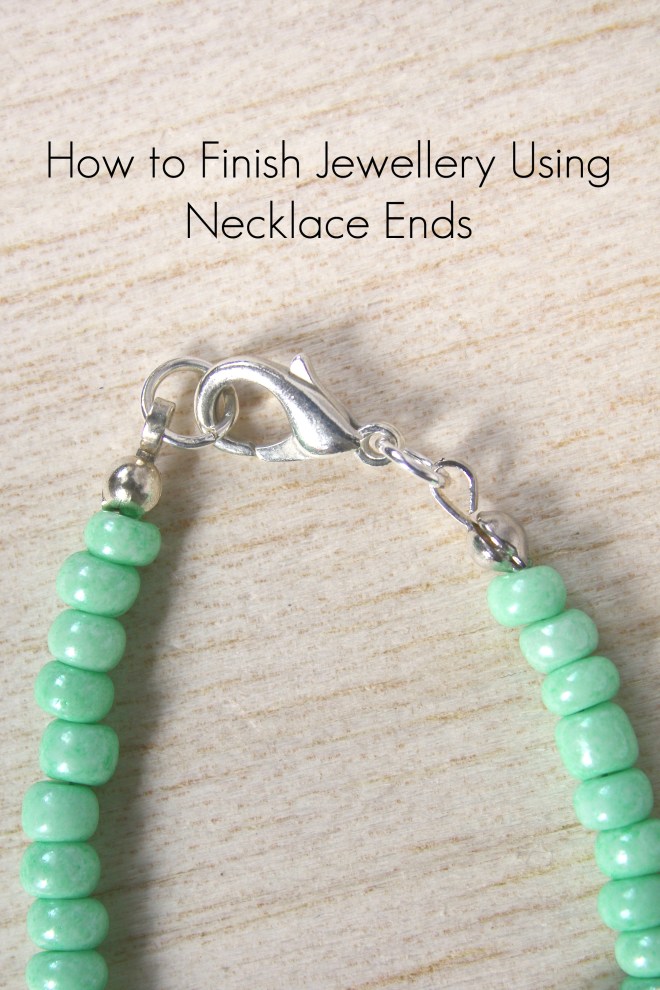
First, gather the supplies you will need: beads, wire, needle-nose pliers, and round-nose pliers. You will also need a jump ring and lobster claw clasp. If you are using glass or metal beads, it is recommended that you use memory wire so that your bracelet keeps its shape.
Start by threading your beads onto the wire. Once all of the beads are on, leave about two inches of wire at the end so that you have enough room to work with when adding the clasp.
Next, use the needle-nose pliers to make a small loop at the end of the wire (this will be where the jump ring attaches).
Then, open up the jump ring and attach it to the loop on the wire. Close up the jump ring again so that it is secure. Finally, use the round-nose pliers to make another small loop on the other end of the wire (this will be where the lobster claw attaches).
How to Make a Bead Bracelet With String
Making a bracelet out of beads and string is a fun and easy project that can be done in an afternoon. All you need is some colorful beads, a length of string, and a few simple tools. With just a little bit of time and effort, you can create a beautiful piece of jewelry that will be enjoyed for years to come.
The first step is to gather your materials. You will need:
-A selection of beads in the colors of your choice
-A length of string or fishing line
-A pair of needle-nose pliers
-Scissors
Once you have everything gathered, it’s time to start threading the beads onto the string. Take your time with this step, as it will be the basis for the entire bracelet. Experiment with different patterns and color combinations until you find something you like.
When you’re happy with the arrangement, use the scissors to trim off any excess string.
Next, take one end of the string and make a small loop using the needle-nose pliers. This loop will act as a clasp, so make sure it’s big enough to easily slide over your wrist.
Once the loop is secure, thread the other end of the string through it to create a lariat shape. Again, use the pliers to secure this end by making another loop.
And that’s it!
Your bead bracelet is now complete. Put it on and enjoy your new piece of handmade jewelry!
How to Make a Bracelet With Elastic Cord
Making bracelets with elastic cord is a fun and easy activity that can be enjoyed by people of all ages. Here are some tips on how to make bracelets with elastic cord:
1. Choose your elastic cord.
You can find elastic cord at most craft stores or online. There are many different colors and thicknesses available, so choose the one that you like best.
2. Cut a piece of elastic cord that is about twice the length of your wrist.
3. Tie a knot in one end of the cord to create a loop. This will be the part of the bracelet that goes around your wrist.
4. Thread beads onto the cord until you reach the other end.
You can use any type of bead that you like, but make sure they are small enough to fit through the hole in the center of each bead.
5 .Tie a second knot in the end of the cord to secure the beads in place.
Trim any excess cord from both ends of the bracelet using scissors .
How to Make Seed Bead Bracelets
Seed bead bracelets are a fun and easy way to add a pop of color to your outfit. They are also great for layering with other bracelets or wearing on their own. Here is a step-by-step guide on how to make seed bead bracelets.
What You’ll Need:
– Seed beads (I used size 11/0 seed beads)
– Stretch cord or beading thread
– Scissors
Instructions:
1. Cut a length of stretch cord or beading thread that is about 2 feet long.
Thread the cord through a needle, if using beading thread. If using stretch cord, you can skip this step.
2. String on as many seed beads as you’d like – I usually do about 60 beads per bracelet.
Once all the beads are strung on, tie a knot in the end of the cord to secure them in place. Trim any excess cord from the ends.
3a.
For a bracelet with an adjustable slipknot closure, make a loop in one end of the cord and string the other end through it, forming a second loop (as shown in the photo below). Pull both loops tight so that the knot sits snug against the beads, then trim any excess cord from the ends.
3b.
For a bracelet with no closure, simply tie both ends of the cord together in a double knot, making sure it’s snug against the beads so they don’t fall off. Trim any excess cord from the ends and your bracelet is finished!
How to Make Stretch Bracelets – Youtube
Hey everyone! In this blog post, I’m going to show you how to make your very own stretch bracelet! This is a really simple and fun project that anyone can do, regardless of their jewelry-making experience.
Plus, stretch bracelets are super trendy right now so you’ll be right on trend if you make one (or several)!
To get started, you’ll need the following supplies:
– Elastic beading cord (I like to use 0.7mm or 1mm thickness for stretch bracelets)
– Beads of your choice (I usually go for 6mm beads)
– A ruler or measuring tape
– Scissors
Optional: If you want to add a clasp to your bracelet, you’ll need a small lobster claw clasp and two jump rings.
okay let’s get started!
The first step is to measure your wrist and cut a piece of elastic beading cord that is about 2 inches longer than your wrist measurement.
For example, if your wrist measures 6 inches around, you would cut an 8 inch long piece of cord.
Next, thread on your beads onto the cord. You can do this in any pattern or design that you like – there are no rules here!
Just have fun with it and see what looks good. Once all of your beads are strung onto the cord, tie a knot at each end of the bracelet to secure the beads in place.
If you’re adding a clasp to your bracelet, do so now by attaching one jump ring to each end of the bracelet and then attaching the lobster claw clasp to one of the jump rings.
That’s it – Your bracelet is now complete!
Popular Beaded Bracelets
The popularity of beaded bracelets can be traced back to the early days of human civilization. Early humans were attracted to the colorful and shiny beads, and they began to use them as personal adornments. Beaded bracelets became especially popular during the Victorian era, when Queen Victoria herself was frequently seen wearing them.
Today, beaded bracelets are still widely worn by people of all ages and genders. They are particularly popular among young women, who often wear them in stacks on their wrists.
Beaded bracelets are usually made with glass or metal beads strung together on a stretchy cord.
The beads can be any color or pattern, and they are often chosen to match an outfit or represent a personal style. Many people enjoy collecting different types of beaded bracelets, and it is not uncommon for someone to have dozens in their collection.
Wearing beaded bracelets is a great way to accessorize an outfit and add a personal touch.
They also make great gifts for friends and loved ones. If you’re looking for something unique, try making your own beaded bracelet using some simple jewelry-making techniques!
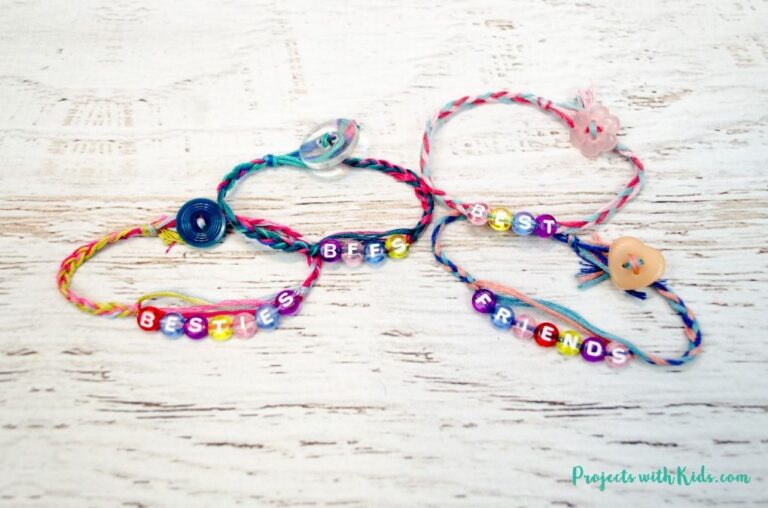
How to Make Bracelets With Letter Beads And String
Making bracelets with letter beads and string is a fun and easy activity that kids of all ages can enjoy. The best part about this craft is that it’s relatively inexpensive to make, and you can use any type of beads or string that you have on hand. Here’s what you’ll need to get started:
-Beads (letter beads, pony beads, or any other kind will work)
-String (embroidery floss, yarn, or even fishing line will work)
-Scissors
To start, cut a length of string that is long enough to comfortably wrap around your wrist several times. Tie a knot at one end of the string to secure the beads in place. Then, start threading the beads onto the string.
Once you have enough beads for your bracelet, tie another knot at the end of the string to keep the beads from falling off. That’s it! You now have a beautiful bracelet that you made yourself.

Credit: www.youtube.com
How Do You Make a Simple Bead Bracelet?
Assuming you would like a tutorial on how to make a basic bead bracelet:
You will need the following supplies:
-6mm beads (you can use any size, but 6mm is a good starting size)
-stretchy beading cord or fishing line
-scissors
-a large needle (optional)
1. Cut a piece of beading cord or fishing line that is about 18 inches long. If using fishing line, it’s a good idea to use a needle to thread the beads onto the string. This makes it easier and prevents the line from fraying.
2. String on your beads in whatever pattern you like. You can do all one color, alternate colors, or make a random pattern. Just make sure that you have an even number of beads!
3. Once all your beads are strung on, tie the two ends of the string together with a double knot and trim off any excess string.
And that’s it! You now have a beautiful bead bracelet that only took minutes to make!
What Materials Do You Need to Make a Beaded Bracelet?
To make a beaded bracelet, you will need:
-Beads (choose the type, color and quantity based on the design you want to create)
-String or wire (again, choose based on your desired design)
-Clasp (optional)
-Pliers
-Scissors
Once you have gathered your supplies, string your beads onto the wire or string. If using a clasp, attach it now. Once all of your beads are in place, use the pliers to twist or bend the ends of the wire or string around to secure them in place.
Finally, cut off any excess wire or string and enjoy your new bracelet!
How Do You Tie a Beaded Bracelet With String?
Assuming you would like a general how-to on stringing and tying bracelets with beads:
Stringing beads onto jewelry cord or beading thread is a basic technique used in many types of jewelry making, from simple bracelets to complex bead weaving projects. The process is relatively simple, but there are a few tricks to getting professional-looking results.
In this article, we’ll cover the basics of stringing beads onto beading thread, including how to add clasps and other findings, how to finish off the ends of your bracelet (or necklace) so it’s secure, and how to avoid some common mistakes.
Supplies Needed:
-Beads (of course!)
-Beading Thread or Jewelry Cord
-Scissors
-Clasp (if desired)
-Needle (optional)
First, decide on the type of beads you want to use for your bracelet. There are all sorts of different materials, sizes, shapes and colors available – have fun mixing and matching until you find a combination you love!
Once you’ve selected your beads, it’s time to choose your beading thread or cord. There are lots of options here too – everything from thin nylon thread to thick hemp cord – so pick something that will complement your chosen beads nicely. If you’re not sure which one to go with, ask for help at your local craft store.
They should be able to point you in the right direction.
What is the Best Material to Make a Beaded Bracelets?
Beaded bracelets are a fun and easy way to add a little flair to your outfit. But with so many different materials available, it can be hard to know which one is right for you. Here is a breakdown of some of the most popular materials used to make beaded bracelets, so you can choose the best one for your needs.
Glass Beads: Glass beads are perhaps the most popular choice for beaded bracelets. They come in a wide variety of colors and styles, so you can easily find ones that match your taste. Glass beads are also relatively inexpensive, making them a great option if you’re on a budget.
However, glass beads can be fragile, so they may not be ideal if you’re looking for something that will stand up to daily wear and tear.
Metal Beads: Metal beads are another popular choice for beaded bracelets. They’re often more durable than glass beads, making them a good option if you want something that will last longer.
Metal beads also come in a wide range of styles and colors, so you can easily find ones that match your taste. However, metal beads can be expensive, so they may not be the best option if you’re on a budget.
Wooden Beads: Wooden beads are another popular choice for beaded bracelets.
They offer a unique look that sets them apart from other materials. Wooden beads are also relatively inexpensive, making them a great option if you’re on a budget.
making simple bead bracelets! 🍭 | jelly record.
Conclusion
This blog post was very informative and gave great instructions on how to make a bead bracelet. I enjoyed reading it and found it to be helpful.

