To make a bead lanyard, you will need the following materials:
-Beads (of various colors and sizes)
-Thread or string
-Scissors
-Tape (optional)
1. First, decide on the pattern or design that you want your lanyard to have.
This can be done by stringing together some beads on a piece of thread or string to get an idea of what it will look like. Once you have decided on a pattern, cut the thread or string to the desired length. Add a few extra inches so that there is room to tie knots later on.
2. Next, start stringing your beads onto the thread or string, following your chosen pattern. It can be helpful to use tape at the end of the thread to keep beads from falling off while you are working.
3. Continue adding beads until your lanyard is the desired length.
Again, leave a few extra inches at the end for tying knots later on.
4a. If you are using thread, once all of your beads are strung onto it, carefully tie each end in a knot to secure them in place and prevent them from coming off easily.
You can also add a drop of glue onto each knot for extra security if desired (this step is not necessary if using string). Trim any excess thread/string from each end if necessary.
- Cut a piece of string or cord that is about twice as long as you want your finished lanyard to be
- Fold the string in half and tie a knot at the center to create a loop
- Thread your beads onto the two halves of the string, making sure to alternate between large and small beads
- Once you have reached the desired length, tie both ends of the string together with a knot
- Trim any excess string and enjoy your new lanyard!
How to Make a Teacher Lanyard With Silicone Beads
When it comes to back-to-school season, one of the most important things for teachers is having a lanyard to hold all of their school supplies. If you’re looking for a fun and easy way to make your own teacher lanyard, then look no further than this tutorial! With just a few supplies, you can create a beautiful and unique lanyard that will be sure to stand out from the rest.
To get started, you’ll need:
-Silicone beads in various colors (I used 50 beads total)
-Lobster clasp
-Jump rings
-Headpin
-Round nose pliers
-Wire cutters
Begin by threading your silicone beads onto the headpin. I used five different colors in my design, but feel free to use as many or as few colors as you like.
Once all of the beads are on the headpin, use your wire cutters to trim off any excess wire. Next, using your round nose pliers, create a loop at the end of the headpin. Now it’s time to attach the lobster clasp.
Open up one of the jump rings and thread it through the loop on the headpin as well as the lobster clasp. Close up the jump ring using your pliers and repeat on the other side with another jump ring. And that’s it!
You now have a beautiful and unique teacher lanyard that is sure to come in handy during those busy school days!
How to Make Lanyards With Silicone Beads
Making your own lanyards with silicone beads is a fun and easy way to add a personal touch to your wardrobe. With just a few supplies, you can create unique lanyards that are perfect for holding ID badges, keys, or other small items. Plus, making your own lanyards is a great way to save money!
Here’s what you’ll need to get started:
-Silicone beads (available at most craft stores)
-Lanyard cord (also available at most craft stores)
-Scissors
-Ruler or measuring tape
To start, measure out the length of lanyard you need and cut the cord accordingly.
Then, thread your silicone beads onto the cord, using as many or as few as you like. Once all of your beads are in place, tie a knot at each end of the cord to secure them in place. And that’s it!
Your new lanyard is ready to use.
How to Make a Beaded Lanyard Badge Holder
Making a beaded lanyard badge holder is a fun and easy project that you can do at home. You will need some basic supplies, including beads, wire, and a lanyard. With just a few simple steps, you can create a unique and stylish badge holder that will keep your ID or badge safe and secure.
First, gather your supplies. You will need approximately 2 feet of wire, beads of your choice, and a lanyard. If you are using an ID badge, you will also need a badge clip.
Begin by threading the wire through the first bead. Then, add the second bead. Repeat this process until all of the beads are on the wire.
Next, take the end of the wire and make a loop. This loop will be used to attach the lanyard to the badge holder. Make sure that the loop is large enough so that it can slide over the lanyard clasp.
Once the loop is made, twist it around to secure it in place.
Now it’s time to attach the lanyard to the badge holder. Simply feed one end of the lanyard through the loop on the back of the holder.
Diy Lanyard Supplies
Lanyards are a great way to keep your ID badge, keys, or other small items close at hand. But buying lanyards can be expensive, and they’re often not as stylish as you’d like. Luckily, it’s easy to make your own lanyard with just a few supplies.
Here’s what you’ll need:
-1 yard of ribbon or cord (thinner ribbon works best)
-Scissors
-Lighter (optional)
-Key ring or clip (optional)
To start, cut your ribbon or cord to the desired length.
If you’re using ribbon, you can seal the ends with a lighter to prevent fraying. Then, fold the ribbon in half and tie a knot near the top. Next, thread the key ring or clip through the loop and pull it tight.
And that’s it! You now have a custom lanyard that you can use for your ID badge, keys, or anything else you need to keep close at hand.
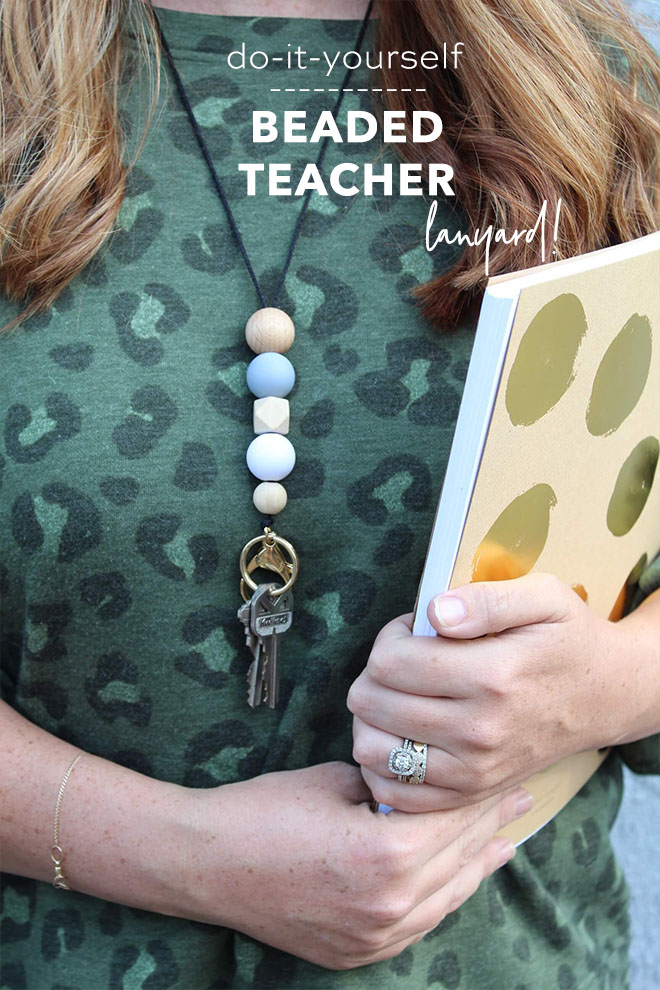
Teacher Lanyard With Beads
As a teacher, you are always on the go. You are constantly moving from class to class, or running to meetings. It can be difficult to keep track of your things, especially your ID badge.
A lanyard is the perfect solution! Not only will it keep your badge easily accessible, but you can also personalize it with beads that represent your interests or style.
There are many different types of beads that you can use to create a unique lanyard.
Glass beads add a touch of elegance, while plastic beads are fun and colorful. You can even find beads that represent your favorite sports team! No matter what type of bead you choose, they will definitely make your lanyard stand out.
Creating a bead lanyard is easy! All you need is some string and some beads. Simply thread the beads onto the string in any pattern you like.
Once you have finished threading all of the beads, tie off the end of the string so that the beads stay in place. Then just clip your ID badge onto the lanyard and you’re ready to go!
Credit: somethingturquoise.com
What Supplies Do I Need to Make a Beaded Lanyard?
Assuming you would like a list of supplies needed to make a beaded lanyard:
-Beads (of various colors and sizes)
-String or thread
-Scissors
-A needle (optional)
That is really all you need!
You can get as creative as you want with the design, using different patterns and bead combinations. Once you have gathered your supplies, string the beads onto the thread in whatever pattern you desire. If you are using a needle, thread it through the beads before cutting the excess string; if not, simply tie off the end of the string once all of the beads are in place.
And that’s it – you’ve made your own beaded lanyard!
How Do You Make a Simple Lanyard?
Assuming you would like a step by step guide on how to make a lanyard:
First, gather your materials. You will need scissors, a ruler or measuring tape, lanyard hooks, key rings, and of course the lanyard itself.
Cut your lanyard to the desired length using the scissors; a good rule of thumb is to make it about 22 inches long.
Next, use the ruler or measuring tape to find the center of the lanyard. Once you have found the center, put a mark at that spot with a pen or pencil.
Then, take one of the lanyard hooks and attach it to the marked spot on the lanyard.
Now do the same thing with the other end of the lanyard; find its center and mark it before attaching another hook. At this point you should have two hooks attached to either end of your lanyard with some extra slack in between them.
To finish things off, grab both key rings and put them through each hook before joining them together. Make sure they are secure before trimming any excess material from the ends of your new homemade lanyard!
How Long Should a Beaded Lanyard Be?
A beaded lanyard should be long enough to comfortably go around your neck and allow the beads to hang down in the front. The length will also depend on the type of beads used. Smaller beads can be strung closer together, while larger beads will need more space and should be spaced further apart.
A good rule of thumb is to leave about 1/2 inch between each bead. If you are using large beads, you may want to leave even more space.
How Do You Make a Breakaway Lanyard?
If you need to make a quick escape, a breakaway lanyard could be just what you need. Here’s how to make one:
You will need:
-A lanyard (I used an old shoelace)
-Scissors
-Lighter
1. Start by cutting your lanyard in half. You want one end to be about 6 inches long, and the other to be about 12 inches long.
2. Next, use your lighter to carefully singe the ends of both halves of the lanyard.
This will help prevent fraying.
3. Now take the shorter end of the lanyard and tie a loop in it. This will be where you attach your keychain or ID badge.
4. Take the longer end of the lanyard and thread it through the loop on the shorter end. Pull until there is about 4 inches of slack, then tie a knot. Trim any excess cordage.
5. Your breakaway lanyard is now complete!
How To Bead Lanyards
Conclusion
This blog post is about how to make a bead lanyard. The author gives step-by-step instructions on how to make the lanyard, and includes photos to illustrate the process. The author also provides a list of materials needed to make the lanyard.

