Cut a piece of thread or fishing line to the desired length of your tassel. Add an extra 3-4 inches to allow for tying the top of the tassel later on.
Thread your needles with beads.
You can use as many colors as you want, and mix them up however you like! Just make sure that all the beads are roughly the same size.
Tie a knot at the end of the thread to secure the beads in place.
Fold the thread in half and tie another knot about 1 inch from the folded end. This will create the “top” of your tassel.
Cut 8-10 pieces of thread, each about 6 inches long.
Fold these in half and tie them around the “top” portion of your tassel, evenly spacing them out. Trim any excess threads.
Your beaded tassel is now complete!
- Gather the materials you will need: beads, beading thread, a needle, scissors, and something to use as a weight (optional)
- String the beads onto the beading thread using a needle
- Leave about 6 inches of thread at the end for making the tassel loop
- Once all the beads are strung on, tie a knot in the thread above the beads to secure them in place
- If using a weight, tie it onto the end of the thread below the knots (this will help keep your tassel from tangling)
- Cut another length of beading thread and wrap it around the center of the bead strand several times, cinching it tight
- Tie several knots to secure it in place
- This will be used to make the top loop of your tassel
- Trim any excess thread
- Carefully slide all of the beads down towards one end of the strand so they bunch together, leaving about 3-4 inches of bare thread at this end (this will become your tassel tail)
- Take your time so that none of the beads fall off as you’re moving them down! 7
- To make sure your tassel keeps its shape and doesn’t unravel, start by tightly wrapping some clear fishing line or monofilament around this center point just below where all the beads are bunched together (do this several times to really secure it)
- Then continue wrapping with embroidery floss or other strongThread until you’ve wrapped at least an inch below where all those ends are sticking out (you can wrap further down if you want a longer “tail” on your tassel)
- Knot securely and trim any excess fishing line or monofilament; then trim excessThread close to where you knotted it so everything is nice and neat looking

Credit: www.interweave.com
How Do You Make a Simple Tassel?
Making a tassel is a fun and easy way to add some flair to your project. All you need is some yarn and a little bit of time. Here’s how to make a simple tassel:
1. Cut a piece of yarn about 18 inches long. This will be used to tie the top of the tassel together.
2. Wrap the yarn around your hand (or a ruler, book, or piece of cardboard) about 30 times.
The more wraps you do, the thicker your tassel will be.
3. Cut another piece of yarn and slide it under all the wraps at the top of your hand (or whatever you’re using). Tie this piece of yarn tight and double knot it for extra security.
4. Carefully slide the wraps off your hand (or whatever you’re using) and cut one end of the bundle so that all the strands are even in length. Trim any uneven ends as necessary.
5. Fold the bundle in half and use the original tying strand to create a loop at the top of the tassel (this will be used for attaching it later on).
Make sure that this loop is big enough so that you can easily slip a needle or thread through it later on. Tie another knot below this loop to secure everything in place.
6 To finish off your tassel, trim any uneven ends and then gently pull each strand apart so that they’re slightly fluffed out – this gives your tassel more body and makes it look less like a stringy mess!
How Do You Make a Beaded Tassel With a Cap?
Making a beaded tassel with a cap is not as difficult as it may seem. You will need some wire, beads, and a few other supplies to get started. Once you have gathered your supplies, follow these steps to create your own beaded tassel with a cap.
1. Cut a piece of wire that is about 18 inches long. Then thread on your beads onto the wire. The number of beads you use is up to you, but keep in mind that you will need enough to cover the entire length of the wire when they are strung together.
2. Once all of your beads are on the wire, twist the two ends of the wire together to secure them in place. Trim any excess wire so that it is flush with the end of the bead strand.
3. Next, take your capped bead and thread it onto one end of thewire strand.
This will be used as the top of your tassel, so make sure that the cap faces outwards.
4. To create the actual tassel part of your design, begin wrappingthe wire strand around itself several times near the top (but not too tightly). This will form a “neck” for your tassel before it fans out at the bottom.
Secure this section by wrapping more wire around it or using pliers to pinch it closed if necessary. If you want a longer tassel, simply wrapthe wires less tightly around themselves near the top before fanning out at bottom . .
Otherwise for shorter ones do vice versa .
Finally cut another small piece off from remaining wrapped portionof excess tail , making sure its long enough to go through center holeof bead twice then string though and pull taught , securing in place( can also add dab of glue for extra security)5 And there you have it! Your very own beaded tassel with acap!
How Do You Make a Tassel Garland With Yarn And Beads?
Tassel garlands are a fun and festive way to decorate for any occasion! They are simple to make, and you can customize them to fit your event’s colors or theme. Here’s how to make your own tassel garland with yarn and beads:
1. Cut two pieces of yarn, each about 30 inches long. Fold the yarn in half, then tie a knot at the center point. This will be the top of your tassel.
2. Wrap the yarn around your hand (or a piece of cardboard) about 20 times. The more wraps you do, the fuller your tassel will be. Cut the end of the yarn, then slide it off your hand (or cardboard).
3. Take one of the long pieces of yarn and thread it through the loop at the top of the tassel. Tie a knot to secure it in place, then trim any excess yarn. Repeat with the other piece of yarn so that both ends are securely fastened.
4 . To add beads to your garland, simply string them onto one or both strands of yarn before tying each tassel in place.
How Do You Make Tassel Earrings With Seed Beads?
Assuming you would like a step-by-step guide on how to make tassel earrings with seed beads:
You will need:
-Seed beads in the color of your choice (amount will depend on desired length of tassel)
-Wire cutters
-Needle nose pliers
-Headpins
-Earring hooks
Instructions:
1. String seed beads onto a headpin, leaving a small space at the top.
You can add as many or as few beads as you’d like – just keep in mind that this will be the length of your tassel. Cut wire with wire cutters, leaving a small space at the end for wrapping.
2. Using needle nose pliers, wrap excess wire around the base of the headpin several times until secure.
Trim any excess wire and add an earring hook. Repeat for other earring.
Beaded Tassel Making for Beginners
Easy Beaded Tassel Tutorial
This easy beaded tassel tutorial is perfect for anyone who wants to learn how to make beautiful tassels! With just a few supplies and some simple instructions, you’ll be on your way to creating stunning tassels in no time.
Supplies needed:
-Beads (I used 6mm glass beads)
-Thread or string (I used embroidery floss)
-Scissors
-Tape (optional)
Instructions:
1. Start by threading your bead onto the thread or string.
I used about 30 beads for my tassel, but you can use more or less depending on the size of tassel you want.
2. Once all of your beads are threaded on, tie a knot at one end to secure them in place. If using embroidery floss, you can also tape this end down with clear tape to prevent fraying.
3. Cut the other end of the thread or string so that it’s about 12 inches long. This will be used to create the loop for hanging your tassel later on.
4. To create the actual tassel, hold all of the beads together and begin wrapping the excess thread or string around them tightly, about 1/2 inch from the top of the beads.
Continue wrapping until you’ve reached the desired thickness of your tassel (I wrapped mine about 10 times). Tie a knot at the end to secure everything in place.
5. Trim off any excess thread or string and then cut through all of the loops at the top of the bead wraps with scissors, being careful not to cut too close to where they’re tied off at the bottom.
Finally, give your tassel a little trimming and shaping if needed and voila – you’ve made yourself a beautiful beaded tassel!
How to Make a Tassel
Making your own tassels is a great way to add a personal touch to any project, and they’re actually quite easy to make! All you need is some yarn and a bit of patience. Here’s how to do it:
1. Start by wrapping the yarn around your fingers (or a piece of cardboard) until it’s as thick as you want your tassel to be. Cut the yarn at one end, leaving a long tail.
2. Tie a piece of yarn around the middle of the wrapped section, snugging it up against your fingers (or cardboard).
Cut the loops at both ends, trimming them so they’re all even.
3. To make the top loop for hanging your tassel, take the long tail from step 1 and wrap it around the center of the tassel a few times. Knot it securely, then snip off any excess yarn.
4. Finally, give your tassel a good trimming all around so it’s nice and even, and you’re done!
Beaded Tassels for Clothes
Beaded tassels are a great way to add some flair to your clothes. They can be used to dress up a plain outfit or add some pizzazz to a more formal one. You can find beaded tassels in a variety of colors, sizes, and styles to suit your needs.
Here are some tips on how to choose and use beaded tassels for clothes:
When choosing beaded tassels for clothes, consider the color of the beads as well as the size and style of the tassel. Tassels come in many different colors, so you can pick one that complements the color of your clothing.
If you’re looking for a more subtle look, choose small beads in neutral colors. For a more dramatic look, go for large beads in bright colors.
Once you’ve chosen the perfect beaded tassel for your outfit, it’s time to attach it!
Tassels can be sewn or glued onto clothing. If you’re sewing them on, make sure to use a strong thread so that the tassel doesn’t come off easily. To glue them on, use fabric glue or hot glue.
Just apply a small amount around the edge of the beadwork and press it onto the fabric. Hold it in place for a few seconds until the glue sets, then let it dry completely before wearing your new outfit!
Beaded Tassel Trim
Beaded tassel trim is a beautiful and elegant way to add a touch of glamour to any outfit. It can be used to dress up a simple pair of jeans or add a bit of sparkle to a cocktail dress. Beaded tassel trim comes in many different colors, so it’s easy to find the right shade to match your wardrobe.
You can also find beaded tassel trim in various lengths, so you can choose the perfect size for your needs.
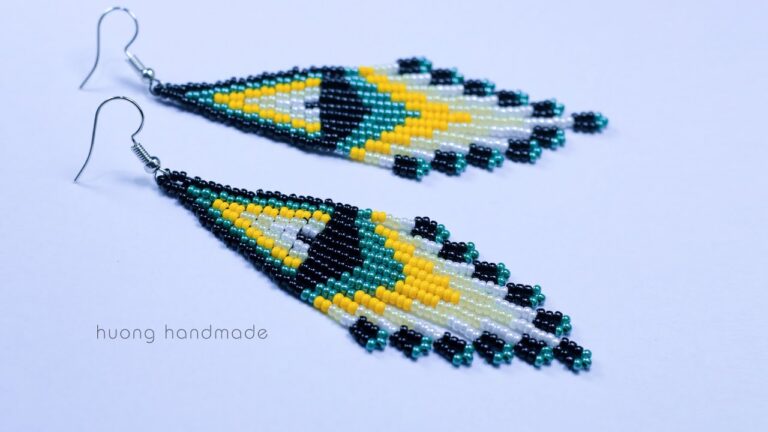
How to Make Beaded Tassel Earrings
How to Make Beaded Tassel Earrings
You can make your own beaded tassel earrings with just a few supplies and some patience. It’s a great way to add some personal flair to your jewelry collection, and you can choose whatever colors and beads you like to create a truly unique pair of earrings.
Here’s what you’ll need:
-Beads (I used seed beads in different colors)
-Headpins (2 per earring)
-Earring wires
-Wire cutters/pliers
How to Make Tassels With Yarn
Making tassels with yarn is a fun and easy project that you can do at home. You’ll need some yarn, scissors, and a piece of cardboard. First, cut a strip of cardboard that is about 3 inches wide and 8 inches long.
Then, wrap the yarn around the cardboard strip 50 times. Once you have wrapped the yarn around the strip 50 times, cut the end of the yarn off so that you have a long tail. Next, take another piece of yarn and tie it around the center of the wrapped yarn to create a tight bundle.
Cut the ends of this piece of yarn so that they are even. Finally, slide the cardboard out from the center of the bundle and trim the ends of all four pieces of yarn so that they are even. Your tassel is now complete!
Seed Bead Tassel Earrings Diy
Tassel earrings are all the rage right now, and we’re here to show you how to make your own! Seed bead tassel earrings are a great way to add a touch of style to any outfit, and they’re easy to make! All you need is some seed beads, wire, and a few other supplies.
Follow our step-by-step tutorial and you’ll be rockin’ your new tassels in no time!
Conclusion
This blog post was very informative and gave great instructions on how to make a beaded tassel. I enjoyed reading it and found it to be helpful. I would definitely recommend this post to anyone who is interested in making their own beaded tassels.

