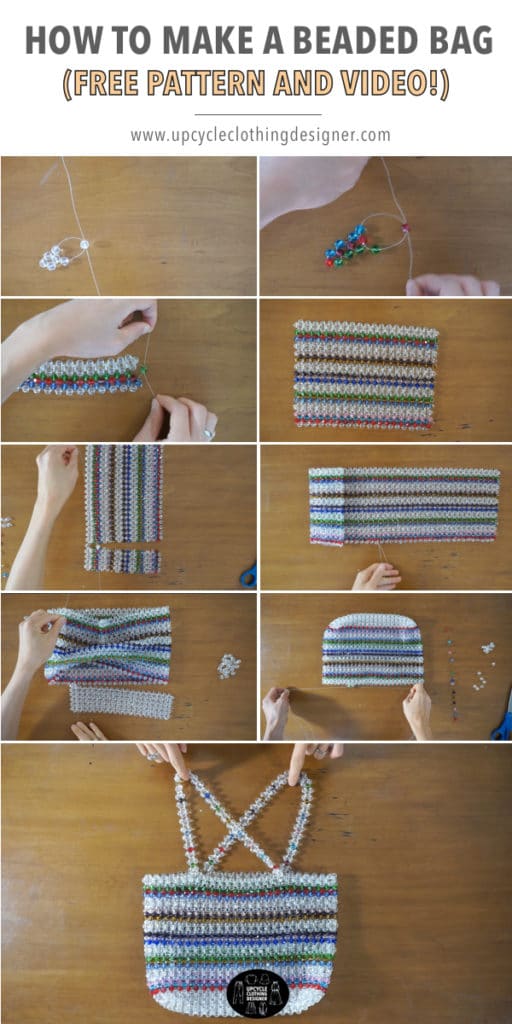
To bead edges, use a needle and thread to sew small beads onto the edge of fabric. Start by knotting the thread on the wrong side of the fabric. Then, string on beads one at a time and sew them in place.
Go slowly and evenly to create a consistent look. When you’re finished beading, knot the thread on the wrong side of the fabric again and trim any excess.
- String the beads onto the thread
- Pass the needle through each bead, making sure that the beads are lying flat against each other
- When you reach the end of the row, pass the needle back through the first few beads to secure them in place
- Repeat steps 2 and 3 until all of the rows are complete
Beaded Edging Tutorial
Picot Edge Beading
Picot edge beading is a beautiful and unique way to finish off your beadwork. It’s simple to do, and it adds a lovely touch to any piece. Here’s how to do it:
1. String your beads onto your thread or wire, leaving a tail of about 6 inches.
2. Make a loop at the end of the thread, and then pass the tail through the loop to secure it. This will be the first picot bead.
3. String on 3 more beads, and then make another loop. Pass the tail through this loop to secure it, making sure that the loops are nice and tight against each other. These will be your second and third picot beads.
Continue stringing on beads and making loops until you reach the end of your work. To finish off, make one last loop and pass the tail through it twice before trimming it close to the beadwork.
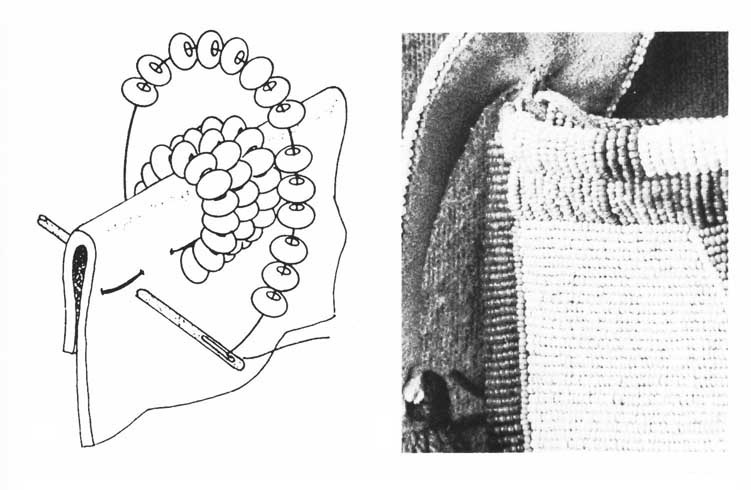
Credit: www.native-american-beadwork.net
How Do You Put Beads on Edges?
There are a few ways that you can put beads on edges. One way is to use a beading needle and thread. You will start by threading your needle and then tying a knot at the end.
Next, you will want to add your beads to the needle. Once you have added all of the beads that you want, you will then take the needle and thread it through the fabric that you are using. You will want to make sure that you go over each bead a couple of times so that they are secure.
Another way that you can put beads on edges is by using an adhesive. You will start by applying the adhesive to the edge of the fabric. Once the adhesive is applied, you will then add your beads.
You can either add them one at a time or do a bunch at once. Just make sure that they are evenly spaced out.
How Do You Finish Beadwork Edging?
There are a few different ways you can finish the edge of your beadwork, depending on the look you’re going for. One way is to simply thread the needle through all the beads one last time, then knot it off and trim the excess thread. This will give you a nice, clean edge.
Another option is to do a picot edge. To do this, you’ll need to string on two beads, then skip over one bead and go back through the second bead (leaving a loop). Continue this pattern until you reach the end of your row, then knot it off and trim the excess thread.
This creates a nice scalloped edge.
If you want something a little fancier, you can do an S-edge beading technique. This creates a zigzag effect and is really easy to do.
Simply string on two beads, then skip over one bead and go back through both beads (again leaving a loop). Continue this pattern until you reach the end of your row; then knot it off and trim the excess thread.
Finally, if you want something super simple but still effective, try doing an overlay edge.
For this technique, you’ll just need two colors of seed beads – one for the background color and one for accenting (a good rule of thumb is to use about twice as many background beads as accent beads). String on your desired number of background beads, then add an equal number of accent beads right on top of them.
What are the Basic Beading Techniques?
Beading is an ancient art form that has been used for centuries to create beautiful jewelry and other decorative items. There are many different beading techniques, but the four basic ones are stringing, weaving, knotting, and stitching.
Stringing is the most basic beading technique and involves simply threading beads onto a string or wire.
You can then add clasps or other findings to create a finished piece of jewelry. Weaving is similar to stringing, but instead of threading the beads onto a single strand, you weave them together using two or more strands. This creates a stronger piece of jewelry that can support heavier beads.
Knotting is another ancient beading technique that is used to secure beads in place on a strand. The most common type of knotting is called the overhand knot, which is simply tying a regular knot in the thread or wire between each bead. This prevents the beads from sliding off and also adds strength to the piece.
Stitching is done by passing a needle through each bead and then tying the thread or wire in place between each bead. This creates a very strong piece of jewelry that can withstand a lot of wear and tear.
How Do You Finish the Edge of Beaded Embroidery?
Beaded embroidery is a beautiful and intricate way to add decoration to fabric. It can be used to create detailed patterns or simply to add a bit of sparkle to an otherwise plain piece of fabric. Beaded embroidery is worked with small beads sewn onto the fabric using needle and thread.
The beads can be sewn on in rows or in random patterns, depending on the desired effect.
When working with beads, it is important to finish the edge of the fabric so that the beads do not fall off. There are several ways to do this, but one of the most common is to sew a line of stitches around the outer edge of the beadwork.
This will secure the beads in place and prevent them from falling off. Another option is to glue a strip of ribbon or another type of trim around the edge of the beadwork. This will also help to keep the beads in place and give the project a finished look.
Conclusion
In conclusion, beading edges is a great way to add a touch of style to any project. With a little practice, anyone can master this technique. By following the simple steps outlined in this blog post, you’ll be able to add beautiful beaded edging to any fabric or paper craft project.

