There are many ways to make friendship bracelets with beads, but one of the most popular is using a simple knotting technique. To start, you will need some string or embroidery floss, a few beads in different colors, and a pair of scissors. Cut a length of string that is about twice as long as your wrist, then thread on your beads in any pattern you like.
Once all of your beads are in place, tie a knot at each end of the string. To wear your bracelet, simply tie it around your wrist like you would any other bracelet.
- Decide what type of friendship bracelet you want to make
- There are many different patterns and designs to choose from
- Choose the colors of beads you want to use
- Once again, there are many options available so mix and match to create a unique bracelet
- Gather all the supplies you need including beads, string or embroidery floss, scissors, and a tape measurer
- Cut the string or floss to the desired length plus an extra inch or two for knotting purposes
- Tie a knot at one end of the string leaving a small loop open
- This will be used to thread on the beads later on
- 6a) If you are making a basic bracelet without a pattern, start threading on beads randomly until you reach the desired length
- Make sure to leave enough room at the end so that you can tie another knot similar to step 4b) If you are following a specific pattern, lay out your beads in the order required for that design before beginning to thread them onto the string 6c) For more complex bracelets with multiple strands, start by braiding or twisting 3 strands together then begin adding in beads as desired 7) Once all your beads are threaded on, finish by tying another knot at the end leaving another small loop open 8) To close up the bracelet, take one side’s loop and thread it through the other side’s then pull tight 9) Trim any excess string then enjoy your new friendship bracelet!
How to Make Friendship Bracelets for Beginners
If you’re looking for a fun, easy craft to do with your friends, look no further than friendship bracelets! These handmade bracelets are perfect for showing off your personality and style, and they make great gifts too. Best of all, they’re simple to make – even for beginners.
Here’s a step-by-step guide on how to make friendship bracelets for beginners.
1. Gather your supplies. You’ll need some embroidery floss (in any colors you like), scissors, and a tape measure or ruler.
Optional: if you want to get really creative, you can also add beads or other decorations to your bracelet.
2. Cut the floss into equal lengths. For each bracelet, you’ll need six strands of floss, each about 36 inches long.
Once you have all your lengths cut, tie them together at one end with a knot. This will be the center of your bracelet where all the strands come together.
3) Braid the friendship bracelet.
To start braiding, take the first three strands of floss and cross the middle strand over the top strand (right over left). Then take the bottom strand and bring it up to become the new middle strand (left over right). Now cross the new top strand over the middle strand (right over left), then take the new bottom strand and bring it up to become the new middle strand again (left over right).
Continue this pattern until you’ve reached desired length – usually about 7-8 inches – then tie off with a knot at the end so that your braid doesn’t unravel. Repeat steps 2-3 with remaining strands of floss to finish both bracelets!
4) Add beads or other embellishments (optional).
If you want to dress up your friendship bracelet even further, try adding beads! Simply thread them onto each strand of floss before you start braiding – that way they’ll be evenly distributed throughout the bracelet as you braid it.
How to Make Friendship Bracelets With Letter Beads
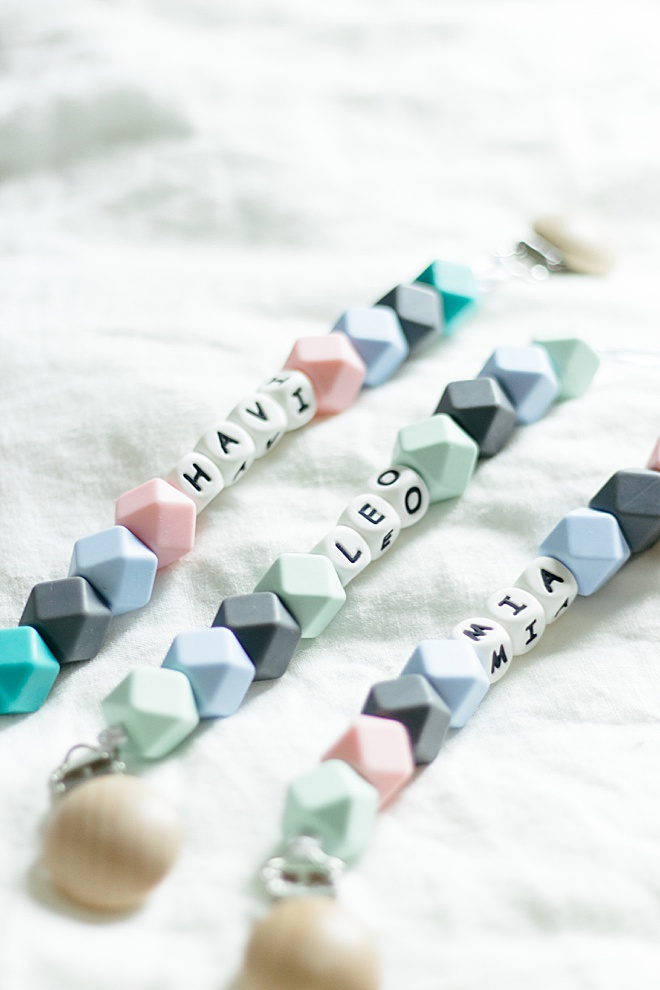
Making friendship bracelets with letter beads is a fun and easy way to personalize your jewelry. You can spell out names, initials, or short phrases with these beads, and they make great gifts for friends and family. Here’s how to make your own:
1. Gather your materials. You’ll need letter beads, thread, scissors, and a ruler or tape measure.
2. Cut a length of thread that’s about twice the size of your wrist.
Thread it through the first bead, then tie a knot at the end of the thread to secure it in place.
3. String on the rest of your beads in whatever order you like. To space them out evenly, use a ruler or tape measure to count out each bead before adding it to the thread.
4. Once all of your beads are in place, tie another knot at the end of the thread to secure them all together. Trim any excess thread, and you’re finished!
Square Knot Friendship Bracelet With Beads
Friendship bracelets are a great way to show your friends how much you care about them. And what better way to do that than with a square knot friendship bracelet with beads? This type of bracelet is not only stylish, but it’s also easy to make.
Here’s how:
1. Cut two pieces of string, each about 18 inches long.
2. Tie the two strings together at one end, making sure the knot is tight.
3. Separate the two strings and begin threading beads onto one of the strings. Once you have about 20 beads on the string, tie it off at the end so the beads don’t fall off. Repeat this step with the other string.
4. To make the square knot, take one of the strings and hold it over the other string so that there is a loop formed at the top. Take the end of the string in your other hand and put it through this loop (over-under-over). Now pull both strands tight so that this first half of the knot is secure.
5. For the second half of the knot, takethestringin your “over” hand and putitunder-over-undertheotherstring beforepullingbothstrands tight again.”Repeat steps 4and 5 until you reachtheendofyourstrings.”
6.”Tiea knowtwotimetomakesureit’s extra securebeforetrimmingany excessstring.”Yourbraceletis now complete!
How to Make Bracelets With Beads
Making bracelets with beads is a fun and easy way to add some personality to your jewelry collection. There are endless possibilities when it comes to bead bracelet designs, so you can always find something that suits your style. Plus, beaded bracelets make great gifts for friends and family!
If you’re new to the world of beaded bracelets, don’t worry – we’ve got you covered with this step-by-step guide.
To get started, you’ll need some basic supplies like beads, string or wire, and clasps. Once you have your materials, decide on the design of your bracelet.
Will it be a single strand or multiple strands? What kind of beads will you use? Once you have a general idea, it’s time to start stringing those beads!
If you’re using multiple strands, start by attaching the clasp to one end of the string. Then, thread on your beads according to your chosen pattern. When all of the beads are in place, attach the other half of the clasp and give your bracelet a little tug to make sure everything is secure.
For a single strand bracelet, simply thread all of your beads onto the string or wire before attaching the clasp at both ends. Again, give your bracelet a little tug before wearing to make sure everything stays in place.
Now that you know how to make basic bead bracelets…have fun experimenting with different designs!
You can try mixing different colors and shapes of beads for an eye-catching effect, or keep things simple with just one type of bead strung in a straight line. The sky’s the limit – let your creativity run wild!
Chevron Friendship Bracelet With Beads
Chevron friendship bracelets are all the rage these days! And it’s no wonder – they’re fun, easy to make, and oh-so-fashionable. But what really sets them apart is the addition of beads.
Beaded chevron friendship bracelets are not only beautiful, but also unique. Here’s how to make your own…
First, choose your colors.
You’ll need two colors of thread (or embroidery floss), and a selection of beads in coordinating colors. Decide on the pattern you want your bracelet to have, and then thread your needle with one color of thread. Make a knot at the end of the thread to secure it.
Next, string on your beads according to your chosen pattern. Once you’ve reached the end of the pattern, make another knot in the thread to secure the beads in place. Repeat this process with the other color of thread, making sure that both threads are going through each bead in the same order.
When you reach the end of both threads, tie them together securely with a double knot and trim any excess thread. Your bracelet is now finished!
Friendship Bracelet With Letter Beads
If you’re looking to add a personal touch to your friendship bracelets, letter beads are a great way to do it! With letter beads, you can spell out names, initials, or words that have meaning to you and your friends. Here’s a quick guide on how to make a bracelet with letter beads:
1. Gather your materials. You’ll need thread, scissors, and letter beads in the colors of your choice.
2. Cut a length of thread that’s long enough to wrap around your wrist several times.
3. String on the beads in the order that spells out your desired word or phrase. Make sure the letters are facing the correct way before tying off the end of the thread.
4. Tie a knot at each end of the thread to secure the beads in place.
Trim any excess thread and enjoy your new bracelet!
Friendship Bracelet Patterns
If you’re looking for friendship bracelet patterns, you’ve come to the right place! There are all sorts of different designs that you can make, and we’ve got a great selection for you to choose from. Whether you want something simple or more complex, there’s sure to be a pattern here that’s perfect for you.
One popular design is the chevron friendship bracelet. To make this bracelet, you’ll need two colors of thread and a ruler. Start by making a knot at one end of the thread, then measure out six inches and make another knot.
This will be the center of your bracelet.
Next, take one color of thread and make a forward knot around the other color, leaving about an inch of slack. Then make another forward knot around the first color, again leaving an inch of slack.
Continue alternating between the two colors in this way until you reach the desired length. When you’re finished, tie off both ends with knots and trim any excess thread.
Another fun friendship bracelet pattern is called the spiral design.
For this one, you’ll need three colors of thread and a ruler or measuring tape. Start by making a knot at one end of the first color of thread, then measure out 12 inches and make another knot. This will be one side of your bracelet base.
Repeat this step with the second and third colors of thread so that you have three 12-inch lengths of knotted thread. Now take the first color again and tie it around all three strands near the top knots, making sure not to pull too tight so that the middle strand is still loose in comparison to the others . Braid all four strands down towards bottom knots , adding extra beads if desired .
When you reach bottom , tie off all four strands with knots . Trim any excess threads , then wear your beautiful new bracelet with pride !
How to Make Friendship Bracelets for Beginners With 2 Strings
Friendship bracelets are a classic craft that has been around for centuries. They are typically made with two strings, but can also be made with four or more. The most common type of friendship bracelet is the simple knot bracelet, which is made by tying basic knots in two colors of string.
There are many different ways to make friendship bracelets, but the simplest method is to start with two strings of equal length. Cut each string to about 18 inches in length, then tie the ends together to form a loop. Next, take one of the strings and make a forward knot around the other string, then pull tight.
Repeat this process with the other string, making sure to keep your knots tight so that the bracelet doesn’t come undone.
Once you’ve tied both strings together, continue making knots in an alternating pattern until you’ve used up all of the string. When you reach the end, tie both strings together in a double knot and trim any excess string.
Your friendship bracelet is now finished!

Credit: www.pinterest.com
How Do You Make a Bracelet With Beads for Beginners?
For beginners, making a bracelet with beads can be daunting. There are so many choices of beads, and stringing them together can seem like a complicated process. But don’t worry!
With a little patience and practice, you’ll be creating beautiful bracelets in no time. Here’s what you need to get started:
-Beads: You’ll need anywhere from 20-40 beads for a bracelet, depending on the size of the beads and how long you want the bracelet to be.
Choose beads that have large holes so they’re easy to thread onto the string. And pick out colors that you like – have fun with it!
-String: Use beading thread or fishing line for your bracelet.
Cut a length of string that’s about twice as long as the finished bracelet will be (so if you want a 7″ bracelet, cut 14″ of string). Stringing the beads is easier if you use two pieces of string instead of one – just tie them together at one end once you’ve got all your beads on.
-Clasp: To finish off your bracelet, you’ll need some sort of clasp.
You can buy ready-made clasps at most craft stores, or make your own using two jump rings (just open them up with pliers and attach them to each end of the bracelet).
Now that you have all your supplies, it’s time to start stringing those beads! Start by threading one bead onto each piece of string, then tie the strings together at one end so the beads don’t fall off.
Once both strings are threaded with beads, tie them together at the other end too – this will be where your clasp attaches. Now gently twist the two strings around each other until all the beads are twisted together in a spiral pattern – this is called “helixing.” Keep twisting until all the spirals are facing inwards towards each other; then gently pull on both ends of the string until all the spirals are touching but not overlapping (if they start to overlap, just untwist until they’re back in place).
Attach your clasp to one end, and voila!
How Do You Make Cute Bracelets With String And Beads?
Cute bracelets can be made with string and beads in a variety of ways. One way is to thread beads onto the string, tying knots between each bead to secure them in place. Another option is to use elastic string, which doesn’t require tying knots.
You can simply thread the beads onto the elastic and they will stay in place. There are also special tools called “bead looms” that can be used to weave beads together into bracelet patterns.
How Do You Make a Homemade Friendship Bracelet?
Making a homemade friendship bracelet is a fun and easy way to show your friends how much you care. There are many different ways to make these bracelets, but the most important part is to use your imagination and have fun!
One of the easiest ways to make a friendship bracelet is to use yarn.
Simply cut several lengths of yarn in different colors and tie them together at one end. Then, braid the yarns together until you reach the other end. Tie off the braid and trim any excess yarn.
Another option is to use embroidery floss or other thin thread. You can create all sorts of patterns with this method, from simple stripes to more complex designs.
If you want something a little more substantial, try using ribbon or strips of fabric instead of yarn or thread.
This will result in a thicker bracelet that will be sure to stand out. Just like with the other methods, get creative with your patterning – there are no rules!
Once you’ve chosen your materials and created your design, it’s time to put the finishing touches on your bracelet.
You can add beads, charms, or anything else you like for an extra personal touch. If you’re giving the bracelet as a gift, consider adding a special message with permanent marker or engraving it onto a tag attached to the bracelet.
No matter what method you choose, making a homemade friendship bracelet is a great way to show someone how much they mean to you – so get creative and have fun!
What is the Easiest Way to Make a Friendship Bracelet?
Assuming you would like tips on how to make a basic friendship bracelet, here are six easy steps:
1. Gather your supplies. You will need embroidery floss in the colors of your choice, a ruler or tape measure, and sharp scissors.
If you want your bracelet to be adjustable, you will also need a piece of string or cord about 6 inches long.
2. Cut the floss. Using the ruler or tape measure, cut each color of floss into 10 strands that are each 36 inches long.
You should have a total of 60 strands when you’re finished cutting.
3. Tie the strands together. Take all of the strands and tie them together at one end using a simple knot.
Make sure the knot is tight so that the strands don’t come undone later on.
4. Separate the strands into groups of three. Once all of the strands are tied together, separate them into 20 smaller groups containing three strands each (60/3 = 20).
You can use any method you want to keep track of which group contains which colors – for example, you could lay them out in rainbow order from left to right, or stack them up with like colors next to each other
5. Begin braiding! To start braiding, take the outside strand from the first group on your left and cross it over the middle strand (now in second position) .
Then take the outside strand from the second group on your left and cross it over both of thoseStrands (now in third position), continuing until you reachthe end Ofthe row . Whenyou get tothe lastgroup , justcrossoverwith Theleftmoststrand Andcontinue Braiding as usual . Afteryou finishonerow , Start another InThesame Way , Crossingover With The StrandtoYourright This Timeinsteadof Yourleft
6 Finish off and wear your new bracelet! Once you reachtheendofthefloss ,Tiethesupplementarystringaroundallofthestrandsandknotitsecurely severaltimes . Trimoffanyexcessstring , Andyourbraceletisreadytowear !
How to Make 3 EASY Friendship Bracelets! (VSCO inspired, adjustable!)
Conclusion
Although bracelets are a common accessory, beaded friendship bracelets are a fun and easy way to show off your personality. By following these simple steps, you can make your own beaded friendship bracelet in no time! With so many different color and style options available, the possibilities are endless.
So get creative and have fun!

