Making beaded jewelry is a fun and creative way to express your personal style. Beaded jewelry can be made using a variety of materials, including glass, metal, and polymer clay beads. You can string beads onto flexible beading wire or thread, or use them to create more intricate designs with bead weaving techniques.
- Choose your beads
- Consider the type of jewelry you want to make and select beads accordingly
- If you’re unsure, start with basic shapes like rounds or cubes in a few different colors
- String your beads
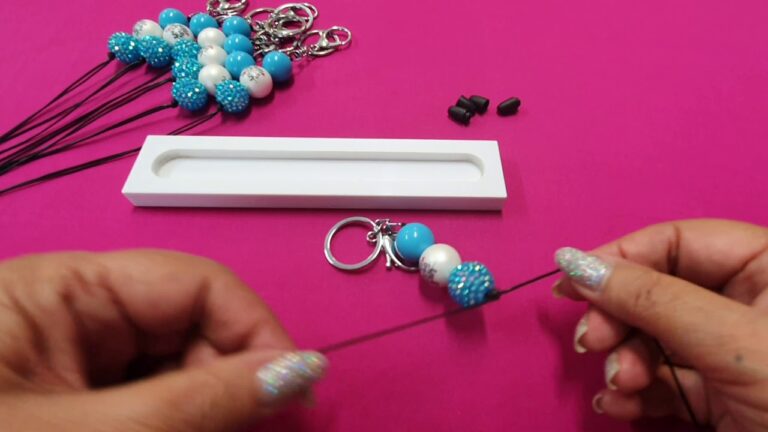
- Cut a length of beading wire or thread and thread it through the first bead
- Continue adding beads until you have the desired length of necklace, bracelet, etc
- Secure the ends
- Once all your beads are strung, tie off the end of the wire or thread with a knot and add a clasp if necessary
- You can also use crimp beads or tubes to secure the ends for a more professional look
- Admire your handiwork!
Youtube How to Make Beaded Jewelry
Making beaded jewelry is a fun and easy way to add some personal flair to your wardrobe. You can make bracelets, necklaces, earrings, and more with just a few supplies and some basic skills. In this blog post, we’ll show you how to make a simple beaded bracelet.
You’ll need:
-Beads (we used 6mm glass beads in assorted colors)
-Jewelry wire (we used 22 gauge)
-Wire cutters
-Needle nose pliers (optional)
1. Cut a piece of wire about 10 inches long.
If you’re using thicker beads or want a longer bracelet, you may need to adjust the length of your wire accordingly.
2. String your beads onto the wire, using as many or as few as you like. We made a pattern of three large beads followed by two small ones, but feel free to get creative!
Just remember that the number of beads you use will determine the final size of your bracelet.
3. Once all your beads are strung on, twist the two ends of the wire together until they’re secure. You can use needle nose pliers to help with this step if needed.
Seed Beading for Beginners
Seed beading is a type of jewelry making that involves stringing small beads together to create colorful and intricate designs. It is a popular craft among both beginners and experienced jewelers alike, as it is relatively simple to learn but still allows for a lot of creativity and personalization.
If you’re interested in giving seed beading a try, there are a few things you’ll need to get started.
First, you’ll need some seed beads in the colors of your choice – these can be found at most craft stores or online. You’ll also need some thread or wire to string the beads on, as well as needle-nose pliers (optional but helpful). Finally, it’s helpful to have something to hold your beads while you’re working with them – like a tray or dish – so they don’t go rolling away!
Once you have all your supplies, start by threading your needle (or attaching your wire) onto one end of the thread. Then start adding beads onto the thread, one at a time. You can do this randomly or follow a pattern – it’s up to you!
Just make sure that each bead is snug against the one before it so that they don’t fall off. When you’re happy with your design, tie off the end of the thread (or wire) and trim any excess. Your new seed bead creation is now ready to wear!
How to Make Beaded Jewelry With Wire
Beaded jewelry is a fun and easy way to add a personal touch to your wardrobe. Wire beading is a great way to get started, as it is relatively inexpensive and easy to work with. With just a few basic supplies and some practice, you can create beautiful beaded jewelry that will last for years.
The first step in wire beading is to choose the type of wire you would like to use. There are many different types of craft wire available, so take some time to explore the options before making your decision. Once you have chosen your wire, gather the other supplies you will need, including beads, pliers, and scissors.
Next, measure out the length of wire you will need for your project. Cut the wire using your scissors, leaving enough extra at the end to allow for wrapping or connecting. Make sure all of your cuts are clean and straight – jagged edges can make it difficult to thread beads onto the wire later on.
Now it’s time to start threading those beads! Start with one bead at a time, sliding it down the length of wire until it rests against the stop bead (this can be another bead or simply knotting the end of the wire). Continue adding beads until you have reached the desired length for your piece of jewelry.
When finished stringing beads, make sure there is enough excess wire at each end for attaching clasps or jump rings (more on that later).
To secure your beads in place and keep them from slipping off the end of the wire, you will need to do some simple wrapping or wiring techniques. For wrapped loops: make a small loop at one end of thewire using round-nose pliers; then wrap excess around base 2-3 times before trimming away any remaining wires.
You can also create “s” hooks or spirals using similar methods; there are many helpful tutorials online if you need some guidance creating these shapes. Finally, don’t forget about jump rings! These metal loops are essential for attaching clasps or other findings onto your jewelery; simply open up one side of the ring using two pairs of flat-nose pliers and slide it onto an existing loop before closing back up again (make sure not to twist jump rings when closing them!).
Attach as many as needed depending on how complex your design is – Have fun!
Beads Making for Beginners
Beading is a great way to show your personality and style. There are so many different ways to make beads, and the options are endless. If you’re new to beading, or just looking for some inspiration, check out this roundup of bead making for beginners.
There are a few things you’ll need to get started: seed beads, wire, pliers, and patience! Seed beads come in all sorts of colors and sizes, so you can really personalize your project. Wire comes in different thicknesses too, so choose what looks best with your beads.
And finally, pliers will help you bend and shape the wire as needed.
Once you have your supplies gathered, it’s time to start creating. One simple design is a basic bracelet or necklace strand.
String your beads onto the wire, leaving enough at the end to attach a clasp. Then use your pliers to twist the wire around itself until it’s secure. That’s it!
You can also make more complex designs by adding in different shapes or wrapping the wire in different patterns.
Making beads is a fun and creative activity that anyone can do. With just a few supplies and some imagination, you can create beautiful pieces of jewelry that are truly one-of-a-kind.
So grab your supplies and give it a try!
Bead Making for Beginners Pdf
Bead making is a fun and rewarding hobby that anyone can enjoy. With just a few simple supplies, you can create beautiful beads to use in jewelry or other crafts. If you’re new to bead making, this beginner’s guide will show you everything you need to get started.
You’ll learn about the different types of beads and how to choose the right materials for your project. You’ll also get tips on designing and creating your own unique beads. So grab your supplies and let’s get started!
How to Make Beaded Earrings
Making beaded earrings is a fun and easy way to add a personal touch to your jewelry collection. All you need are some basic supplies and a little creative flair. Here’s how to get started:
1. Gather your materials. You will need beads, wire, needle-nose pliers, and wire cutters. Choose beads in colors that coordinate with your wardrobe, or opt for unique shapes and sizes to create one-of-a-kind earrings.
2. Cut a length of wire that will comfortably wrap around your wrist three times. Using the needle-nose pliers, make a small loop at one end of the wire. This will be the top of your earring.
3. String on the beads, using as many or as few as you like. Once you’ve reached the desired length, use the needle-nose pliers to make another small loop at the end of the wire (this will be the bottom of your earring). Trim any excess wire with the wire cutters.
4. That’s it! Your new beaded earrings are ready to wear!
How to Make Beads Necklace Video
Making a bead necklace is a fun and easy project that anyone can do! With just a few supplies, you can create a beautiful piece of jewelry to wear or give as a gift. This how-to video will walk you through the steps necessary to make your own bead necklace.
You’ll need:
-Beads (choose whichever colors and sizes you like!)
-String or thread
-A needle (optional)
-Scissors
1. Start by threading your string or thread through the first bead.
If you’re using a needle, simply thread it on and then string the first bead onto the needle. Otherwise, you can just tie a knot in one end of the string to keep the beads from falling off.
2. Continue adding beads until your necklace is the desired length.
Keep in mind that you’ll want to leave enough room at the end to be able to tie it off.
3. Once all of your beads are on, carefully remove the needle (if using) and tie both ends of the string together in a secure knot. Trim any excess string and enjoy your new necklace!
How to Make Bead Necklace And Earrings
Making bead necklaces and earrings is a fun and easy way to add some flair to your wardrobe. With just a few supplies, you can create beautiful pieces that will complement any outfit. Here’s what you need to get started:
Beads: You’ll need enough beads to string together the length of necklace or bracelet you want. For earrings, you’ll only need 2-3 beads per earring. Choose beads that are all the same size, or mix it up with different sizes for a more interesting look.
Stringing material: You can use beading wire, fishing line, or even strong thread like embroidery floss. Just make sure whatever you use can hold the weight of the beads without breaking.
Tools: You’ll need something to help you thread the beads onto the stringing material.
A needle works well for smaller beads, while a toothpick or chopstick can be helpful for larger ones. You’ll also need scissors to cut the stringing material when you’re finished.
Now that you have your supplies, let’s get started!
String your beads onto the stringing material, leaving about 6 inches at each end so you have room to work with. Once all of your beads are on, tie a knot at each end to keep them in place. If your necklace or bracelet is too long, simply trim off any excess stringing material with scissors until it’s the perfect fit.
And that’s it – now you have a beautiful new piece of jewelry to show off!
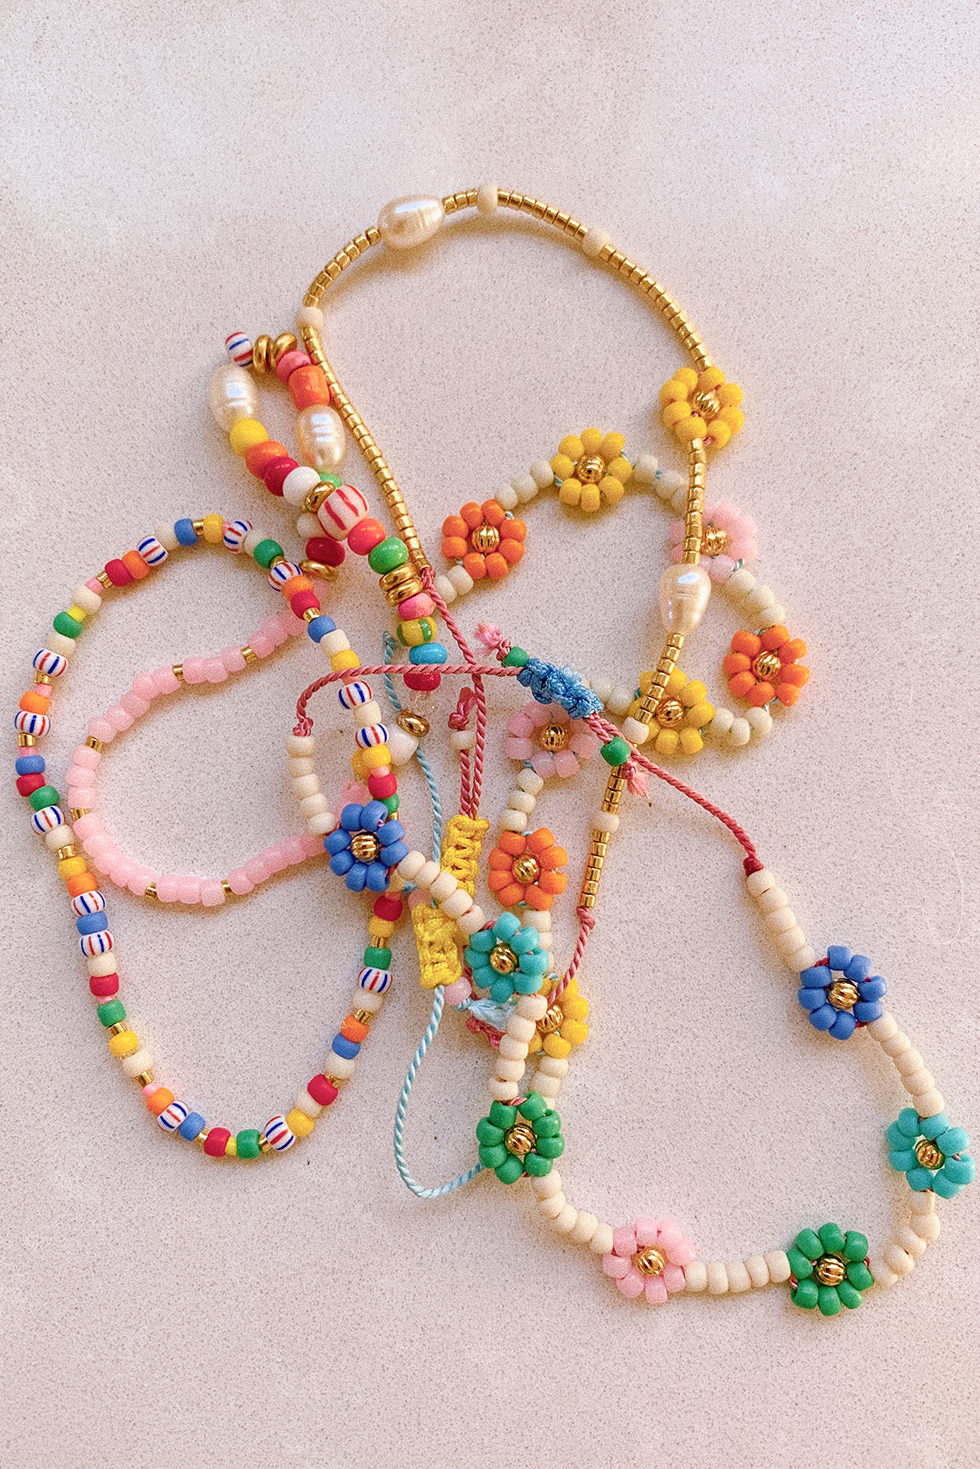
Credit: honestlywtf.com
What Do You Need to Make Beaded Jewelry?
Making beaded jewelry is a fun and creative way to express your personal style. There are many different types of beads that you can use to create unique and beautiful pieces of jewelry. Here is a list of what you need to get started:
-Beads: There are many different types, sizes, shapes, and colors of beads available. You can find them at craft stores, online, or even make your own!
-Stringing material: This is what you will use to string the beads together.
It can be made from a variety of materials including nylon thread, fishing line, or even dental floss!
-Needle: You will need a needle that is small enough to fit through the holes in the beads. A beading needle is ideal, but a sewing needle will work in a pinch.
-Scissors: You will need scissors to cut the stringing material when your jewelry is finished.
Is Making Beaded Jewelry Profitable?
Making beaded jewelry is a great way to make some extra money. It can be profitable if you put in the time and effort to sell your pieces. There are a few things you need to keep in mind when selling beaded jewelry.
First, you need to create unique and high-quality pieces. Second, you need to market your jewelry well. And third, you need to price your jewelry competitively.
If you can do all of these things, then making beaded jewelry can be a very profitable endeavor!
What Supplies Do I Need to Start Beading?
When it comes to beading, there are a few key supplies that you will need in order to get started. These include:
beads – these can be made from a variety of materials including glass, metal, and plastic; choose the type of bead that you want to work with based on the project you are creating
stringing material – this is what you will use to string your beads together; options include thread, wire, or fishing line
clasp – this is used to fasten your beaded piece around your wrist or neck; choose a clasp that is easy to open and close so that you can take your jewelry on and off with ease
needle – if you are using thread as your stringing material, then you will need a needle in order to thread it through the beads; look for a needle that has a sharp point but is not too thin so that it can easily pass through the holes in the beads
tools – depending on the type of beads you are working with and the project you are creating, you may need additional tools such as pliers (for bending wire), scissors (for cutting thread or fishing line), or a bead reamer (for enlarging bead holes).
How Do I Start Making Beaded Bracelets?
Assuming you would like a step by step guide on how to make beaded bracelets:
You will need the following tools and materials:
-Beads (of your choice)
-Bracelet stringing wire
-Wire cutters
-Clasp
-Lobster claw clasp opener (optional)
Step One: Cut Your Wire. Depending on the size of your wrist, cut your bracelet stringing wire to about 8 inches longer than the circumference of your wrist.
This will allow room for knots and movement of the beads. If you are unsure of the size, it is always better to err on the side of too much wire, rather than too little. Step Two: String Your Beads.
String your beads onto the bracelet stringing wire, using as many or as few beads as you like. You can do this free form, or use a pattern. Once you have all of your beads on the wire, double check that there is enough slack at either end to comfortably tie a knot later on.
Step Three: Finish Off Your Bracelet with a Clasp. To finish off your bracelet and make it wearable, you’ll need to add a clasp at one end. You can do this by threading both ends of the bracelet through a small loop at one end of a lobster claw clasp, then closing off the loop with needle nose pliers.
Alternatively, you could use jump rings to connect your clasp (if it does not have an attached loop).
How to make crystal necklace/ PART-1/ How to make beaded jewelry/Jewellery making tutorial#PART -1
Conclusion
This blog post was very informative and helpful. It taught me how to make beaded jewelry and gave me some great tips on what type of beads to use. I really enjoyed reading it and I will definitely be using the information I learned from it to make my own beaded jewelry.
Thank you for sharing your knowledge!

